A HoloLens Emulator allows for testing of holographic applications on your PC without the need for a physical HoloLens, the emulator also includes the HoloLens development toolset. The HoloLens Emulator uses a Hyper-V virtual machine, which means human and environmental inputs read by HoloLens sensors are simulated from your regular keyboard, mouse, or Xbox controller (plus point). It is not necessary to modify your projects to run on the emulator, the app runs as if it is on an actual HoloLens.
This article details the process of creating & using the HoloLens Emulator. An emulator can be created on a Windows 10 machine with Hyper-V feature enabled, after which testing can be done in the same manner as with an actual HoloLens physical device.
Covered Topics
- Installing and Configuring Emulator
- Toolbar
- HoloLens Device Portal & Virtual Input
- Keyboard Input
- Intune Enrollment
- Intune Portal Device View
Prerequisites for HoloLens Emulator
Requirements*
- 64-bit Windows 10 Pro, Enterprise, or Education
- 64-bit CPU
- CPU with four cores (or multiple CPUs with a total of four cores)
- 8 GB of RAM or more
- In the BIOS, the following features must be supported and enabled:
- Hardware-assisted virtualization
- Second Level Address Translation (SLAT)
- Hardware-based Data Execution Prevention (DEP)
- GPU requirements
- DirectX 11.0 or later
- WDDM 1.2 graphics driver or later (first gen)
- WDDM 2.5 graphics driver (HoloLens 2 Emulator)
- The emulator might work with an unsupported GPU, but will be slower
- Windows 10 SDK needs to be installed before proceedings to HoloLens installation and configuration.
- Visual Studio 2019 (Link)
*In addition to meeting the above listed system requirements, please ensure that the “Hyper-V” feature has been enabled on your computer as follows:
Control Panel -> Programs -> Programs and Features -> Turn Windows Features on or off and check that Hyper-V is selected.
Installing and Configuring Emulator
Once above requirements fulfilled and installation of above mentioned prerequisites, we will now install and configure it.
- Install the latest version of HoloLens Emulator from here.
- Follow the steps below to create a project in Visual Studio
- Create a new Project
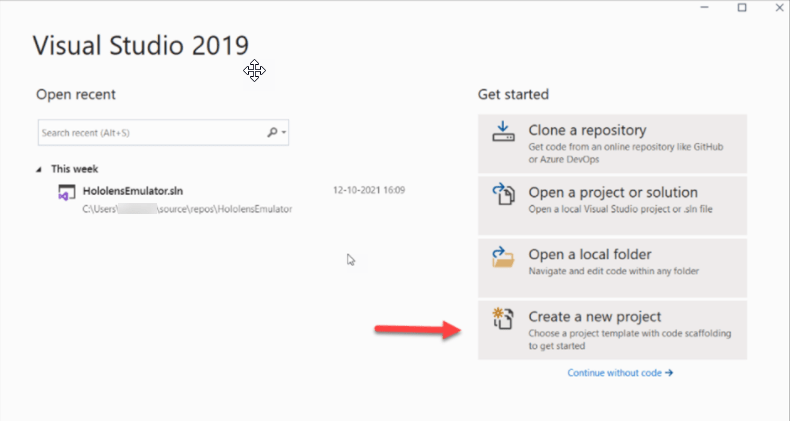
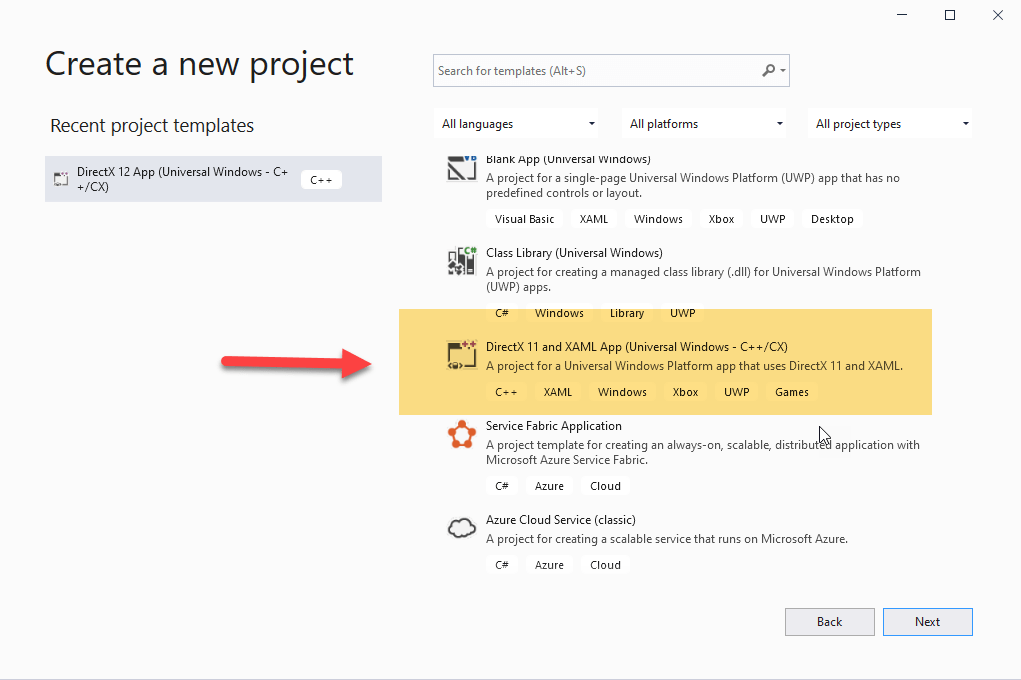
- Select C++ – Windows – UWP (Universal Windows Platform) app
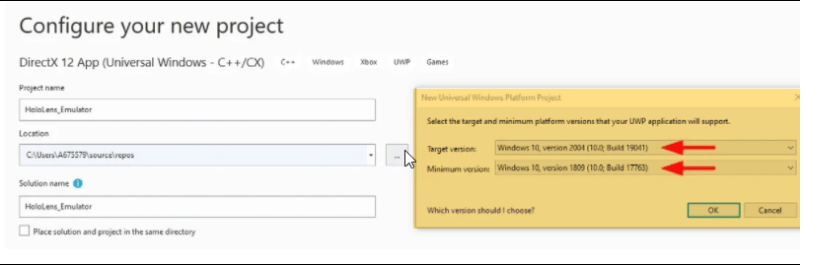
- When prompted, accept the defaults for target and minimum versions, or optionally make changes as you wish.
- The UWP app will be built from the selected Template, there is no need to write any code. Change the Release to x64 and select the installed HoloLens Emulator (not Simulator) > Click on the green arrow to start the emulator:

- The HoloLens Emulator will start (Hyper-V should be enabled) > it will then be ready to be enrolled in Intune.
- When using a Holographic device it may take some time to send the command with a regular keyboard and mouse, but it is achievable.
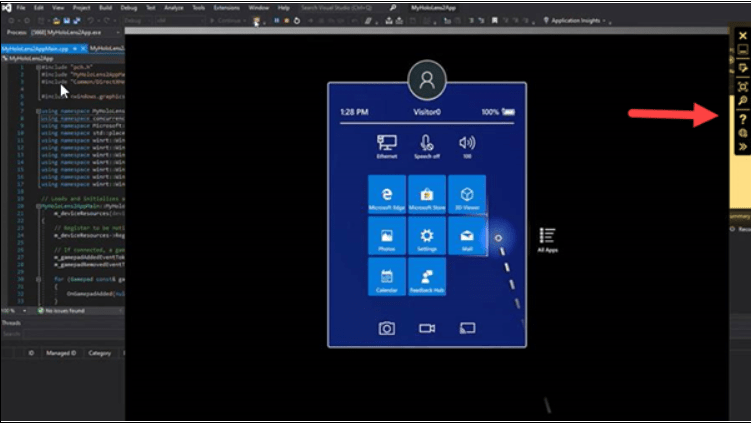
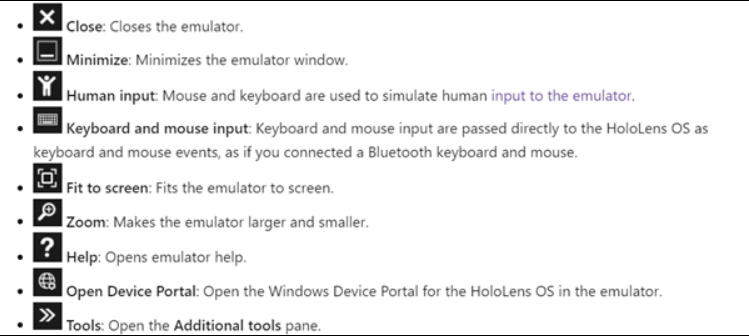
Toolbar
Once, launched, the toolbar (on right hand side) can be accessed for settings and changing preferences.
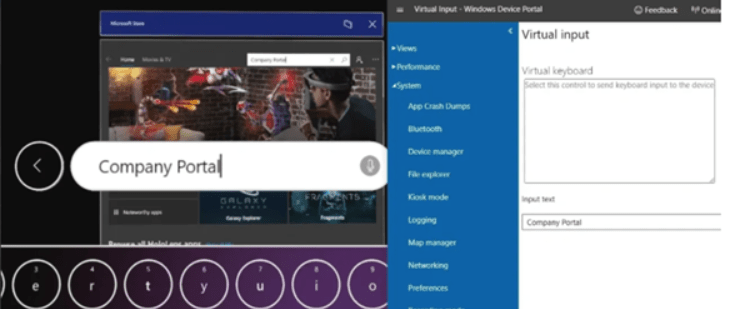
HoloLens Device Portal & Virtual Input
There is a web server on the HoloLens device which can be connected from a web browser for more advanced settings and configurations.
The device has many built in features, such as the Virtual Input and Speech Recognition features which can also be used to send input. The built-in microphone in Windows 10 is compatible with the speech recognition feature.

Keyboard Input
Listed below are the keys that can be used from a regular keyboard, mouse and/or Xbox controller.
- Walk forward, back, left, and right – Use the W,A,S, and D keys on your keyboard, or the left stick on an Xbox controller.
- Look up, down, left, and right – Select and drag the mouse, use the arrow keys on your keyboard, or the right stick on an Xbox controller.
- Action button press on controller – Right-click the mouse, press the Enter key on your keyboard, or use the A button on an Xbox controller.
- Home button press on controller – Press the Windows key or F2 key on your keyboard, or press the B button on an Xbox controller.
- Controller movement for scrolling – Hold the Alt key and the right mouse button, then drag the mouse up / down. In an Xbox controller, hold down the right trigger and A button and move the right stick up and down.
Intune Enrollment
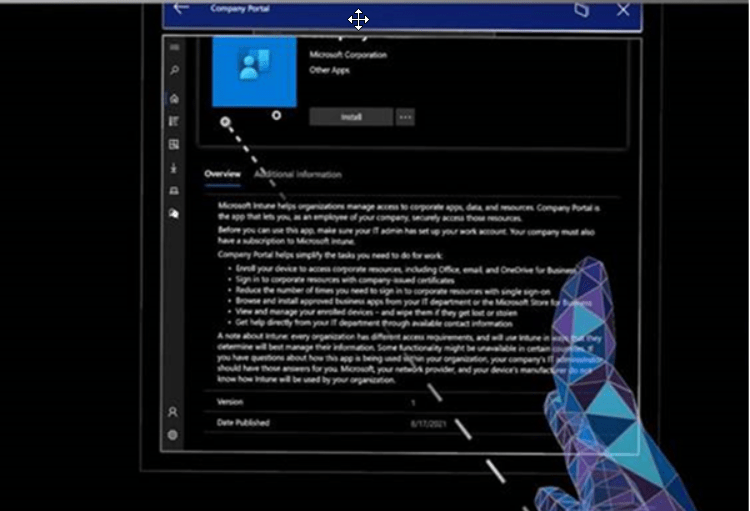
To enroll the device into Intune, first install the Company Portal app, then organizational credentials can be used to enroll the virtual device, so that it can be used further for testing:
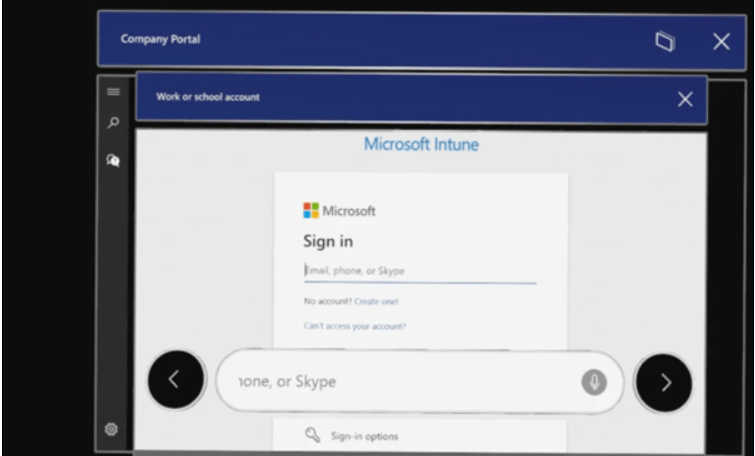
STEP 1
- Please refer above screen shot to send your input or from the keyboard to search company portal app, once found, download and install.
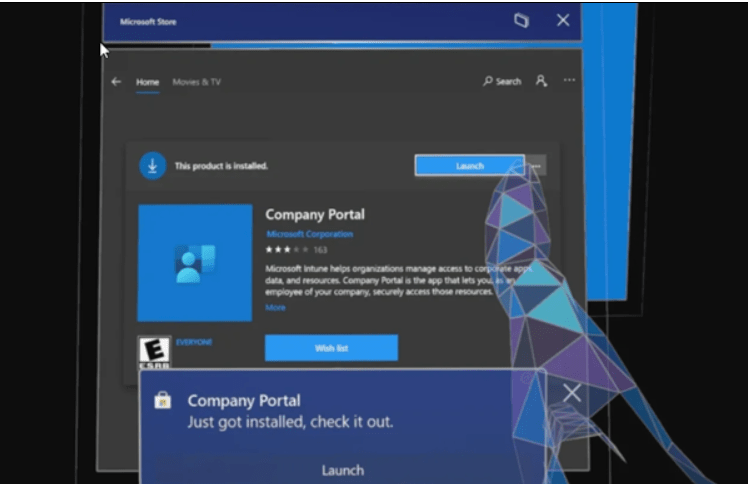
STEP 2
- Launch the Company Portal app – speech recognition option can also be used with inbuilt mic in Windows 10 device.
- Login with credentials and follow the process for MFA, once complete, it will get registered in Azure and enrolled with Intune as a compliant device.
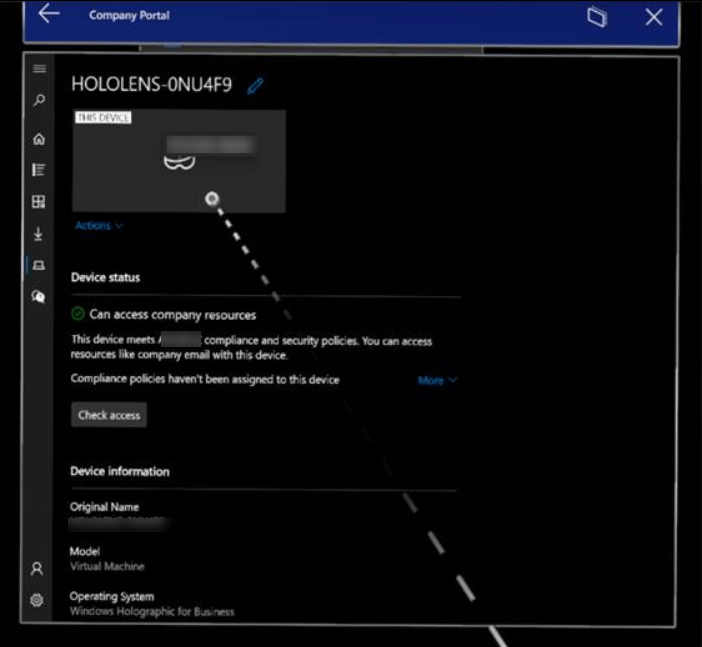
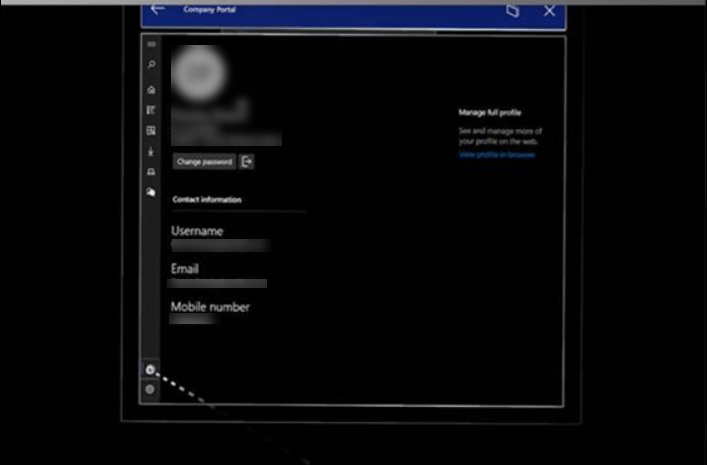

Intune Portal Device View
- The HoloLens Device can be viewed in Intune to verify identity and compliant details.

